Friday, May 25, 2012

Claw Foot Tub Renovation


I was on the hunt for a claw foot tub for the cabin and was very excited when I finally found one. It was reasonably priced  (see this post) and in decent shape. It needed a bit of work on the exterior but the interior porcelain was in pretty good shape. The interior porcelain was of more concern to me when shopping then the exterior; the outside I could restore but the inside I would have had the extra expense of that restoration.  

We had the tub stored in the pole barn and I had to convince The Husband to help me get it into the garage so I could work on it. Did I mention how happy he is that I have invaded HIS domain?

 
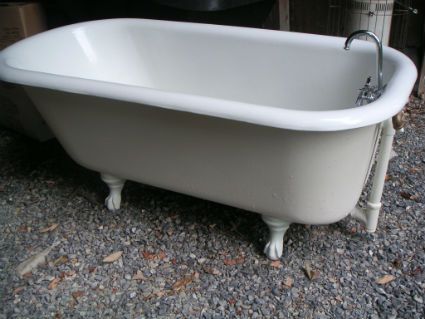
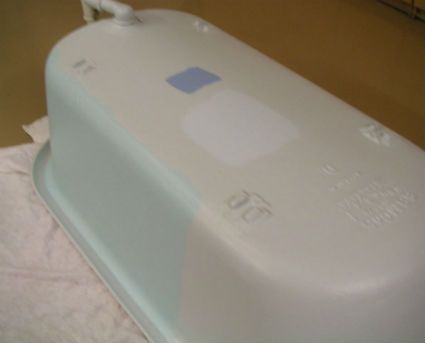
Here it is sitting in the garage. That’s my helper checking out the drop cloths I have gathered up. I removed the faucets and I was ready to get to work. We needed to find THE Husband again cause somebody has to get that tub turned over and onto those drop cloths! 

 
My “supervisor” checked things out but volunteered no assistance what so ever! 

 
Some helper I have! The Husband did his part and we got it flipped over onto the drop cloths so I could start working the exterior and the feet. 

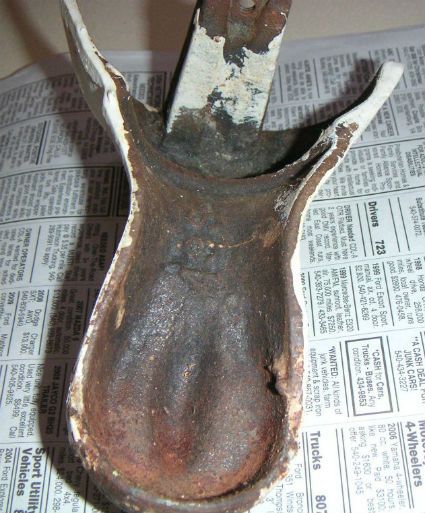
The feet were in pretty bad shape on close inspection so I removed them to work on them easier and also I wanted them a different color than the body of the tub. 

 
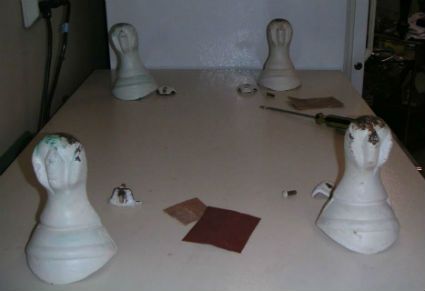
As you can see, they weren’t pretty! The inside of the feet had not been painted in many years and they were in serious need of some attention. 

 
I sanded, used a wire brush and sanded some more. Now they were ready for a rust inhibiting primer and paint. Professional equipment could have done a better job but I wanted the tub to retain some of its age and besides, I’m cheaper! 

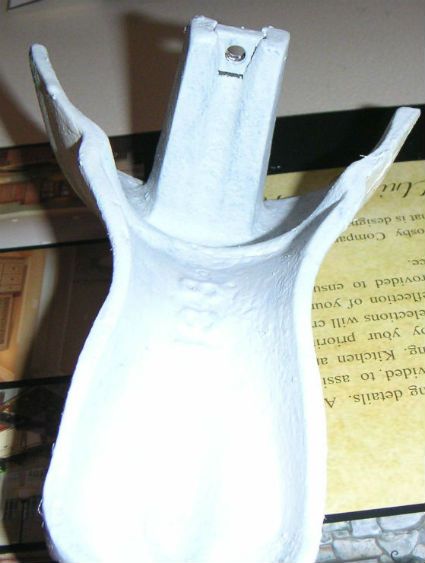
After some work I had the feet looking pretty good. After a good bit of work I had the feet all prepped, primed and ready for paint. Wow, big difference huh?

 
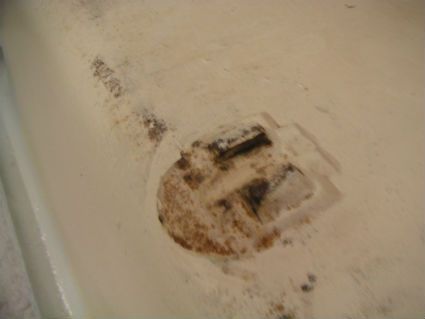
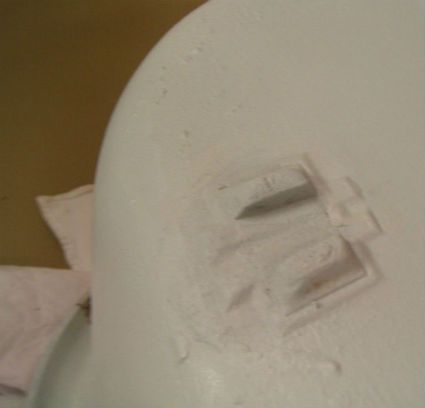
There was also some minor rust where the feet had attached to the tub. 

 
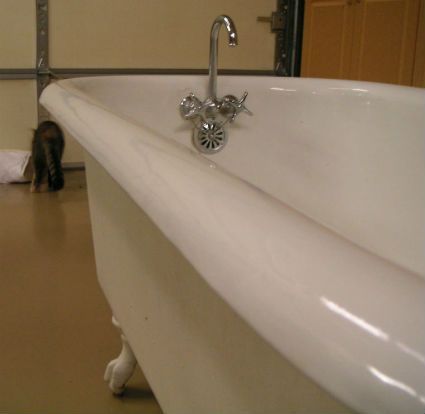
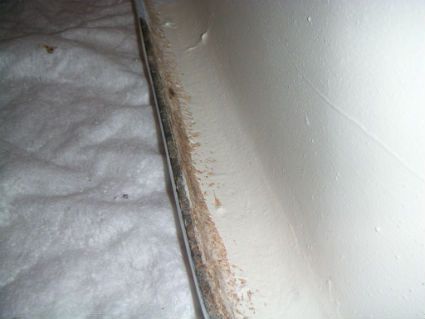
There was also a good bit of rust under the rim that I needed to tackle as well. There was also some paint spatters around the rim of various colors from all the bathroom colors this tub had been surrounded by; at times it had led a colorful life. The paint was easy to remove; now to tackle all the rust. 

 
After much sanding the tub exterior was ready for rust inhibiting primer. A nice feature of the old claw foot tubs is that you can paint the exterior any color you desire and not interfere with the interior porcelain. I decided that I wanted white feet and a pastel blue exterior and now its time to prime and paint.


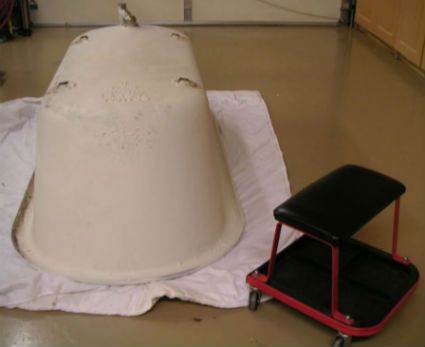
Do you see that little stool on wheels in the photo? That is the coolest thing. I can just scoot all around the tub working and it really saves time and my back. This awesome little stool belongs to The Husband and he purchased solely to use when cleaning up his motorcycle. Does he know I am using it to paint? Uh … uh … well …ppffttt… sure (crosses fingers) Angel, shhhhh.  Did I mention it is a real handy thing?

It’s real important to use a rust inhibiting primer when doing this type of work. You don’t want to spend all this time and then have your work ruined when the rust starts peeping through your paint job; not a good thing. I decided to use a tinted primer to help in the process, so I had the primer tinted in a shade close to the paint color.


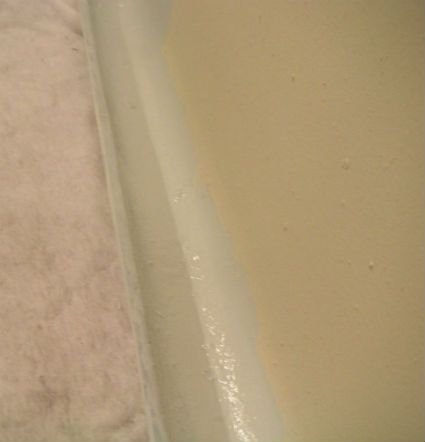
Its going to take a couple coats of primer to seal that rust up well.


I was painting away (on the stolen stool) and I got this distinct feeling I was being watched.


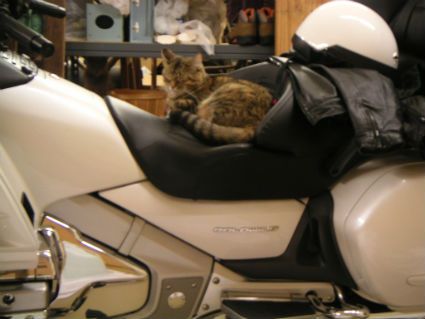
Allow me to introduce you to Demon, yes that’s her name and trust me it fits! Upon being caught in a no-no spot she looked at me and my stolen stool and promptly closed her eyes and went to sleep! When I get all the stinky paint and clean-up products out everyone usually scatters far away from me…except Demon. The Husband’s last words to me after helping me get the tub in place was “You’re not going to get paint on my motorcycle are you?” Well, there is no PAINT on the motorcycle so I went back to work while Demon napped !  LOL, The Husband was not having a good day!


Here it is getting more primer. Those nice color spots on the bottom are my experiments with color choices. The photo doesn’t show well but I decided the paler color was the winning choice.

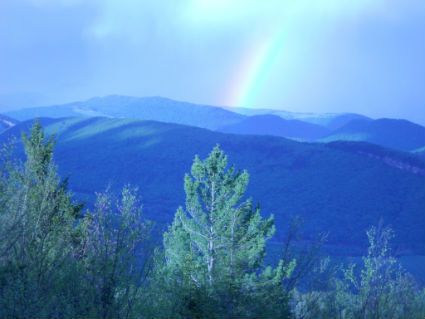
Now in our excitement to get the tub finished we missed a few pictures. I know, shame on me! We have been roughing it a bit at the cabin and were getting really excited to get the bathroom completed. I did grab a shot of it in its finished glory all loaded on the truck and ready to go to cabin. Its feet are still removed to keep it flat in the truck bed. This still has to get to the top of a mountain!


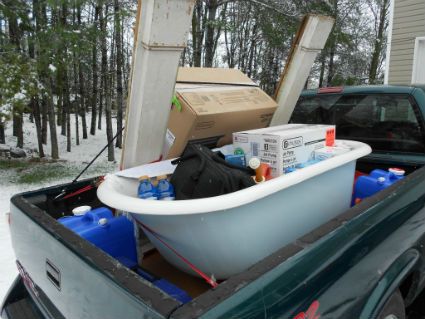
Yes, that is snow on the ground! Now you know why we were so excited to get the tub to the cabin. Those sun showers just weren’t cutting it anymore! Brrr!!!! 

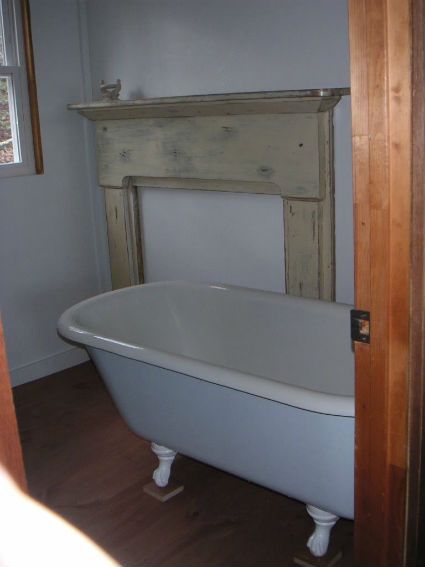
Finally, the tub made it to the cabin and into its new home. The restoration job turned out wonderful and I was very pleased! Those pieces of wood are under the feet to protect the floor while the men are finished sliding it around to hook up all the plumbing.

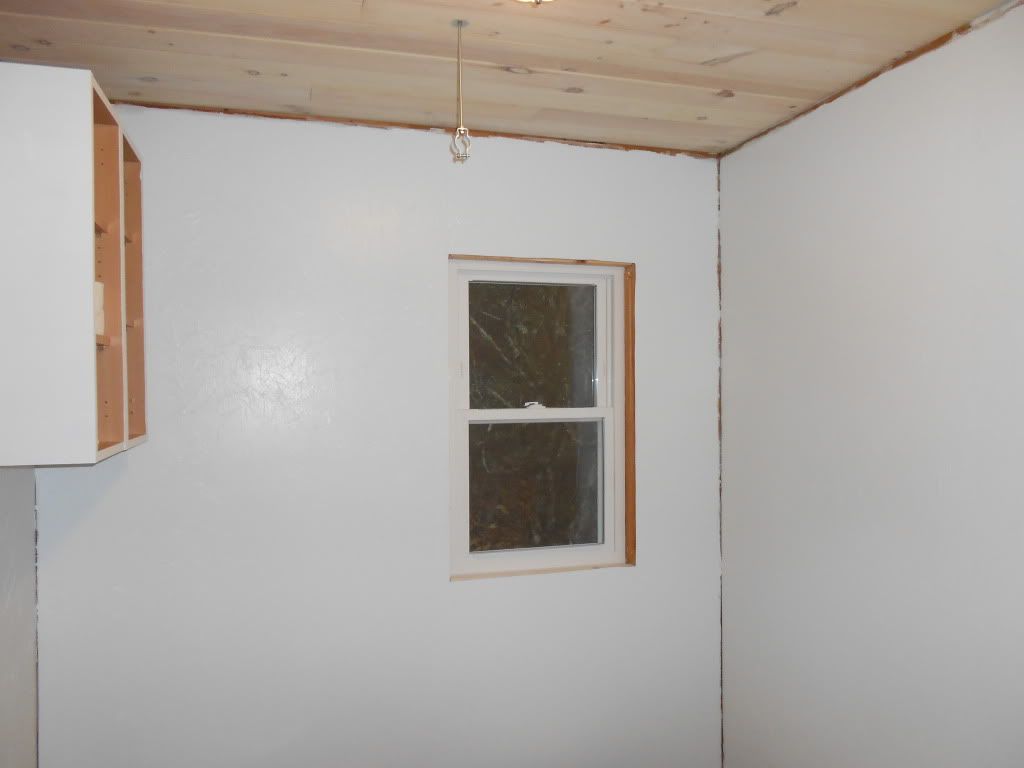
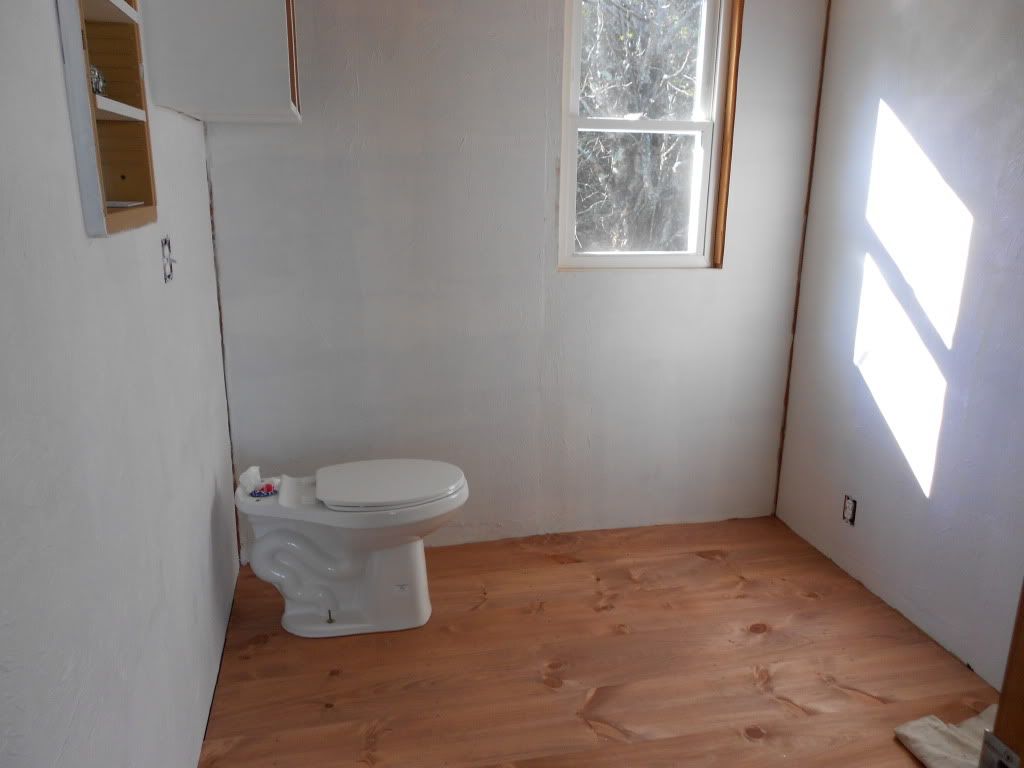
The bathroom is not huge and I was having some trouble getting a good angle for a picture. I’ll have The Husband try to get better bathroom photos as we progress along. 


All that work paid off. I think it turned out gorgeous and I can’t wait to try it out! 

Belle

Wednesday, May 23, 2012

Updates Coming!!!

I have way behind on updates and I do apologize. I’m not going to even go into details (excuses); I’m just going to pick up where I left off.

We have spent minimal time at the cabin working this winter as we winterized the cabin and at times it was totally inaccessible. The elevation on our cabin deck is 4412’; it’s a different climate there for sure! Spring has rolled around and now we are back working on it as much as we are able to; the cabin is a 2 hour drive from our home. We have been rolling along again with the remodel.

Spring has come to the mountain! 


Beautiful! 


The wild azaleas were in full bloom; their dark pink blooms brightening up the mountain and their lovely scent filling the air. It was a beautiful site. The Husband even picked me a handful for the cabin. Vase? No, but they were beautiful in a drink bottle on the counter. Thanks Hon! 


The leaves are all popping out and the mountain is coming to life. 


Look carefully in these photos and you’ll see the illusive Mrs. Grouse. 


It was a glorious couple days on the mountain; complete with a beautiful rainbow! 


I am so looking forward to long lazy days enjoying the mountain, BUT need to finish this remodel!

Ok, let’s get rolling with the updates!

Belle

Sunday, November 20, 2011

Shabby Chic Mantle for the Cabin

There was an old farmhouse not far from our home that had to be demolished and we were lucky enough to get one of the mantles.

This mantle was in need of some attention. We took it to the cabin and I worked on it there. 
Ready for attention
Sorry about the shadows; it makes it easy to tell whether The Husband or I took the pictures. Guess who is not the photographer!


Lots of layers of peeling and chipping paint.
This was a job to clean up and restore. There was multiple layers of dirt and paint. All those layers of paint were also lead based so I needed to work outdoors and wear proper protective gear. The top paint layer was white and I wanted to remove that layer. Then there was a light yellow layer, a darker yellow and then a blue gray paint. Not to mention the many colors around the sides from each time a room was painted a new color.


This was the layer of white coming off using a paint stripper. Then I started sanding to achieve the shabby chic look I was after. 
So, I sanded and sanded.


and sanded some more!

After I had sanded to just the look I was looking for I gave it two coats of polyurethane.


The carpenter then installed this on the bathroom wall. I plan on putting the clawfoot tub in front of it. I was really pleased with how the mantle turned out. Thanks Rosetta!

The bathroom is starting to take shape and I can't wait for it to be finished. Next, we install the clawfoot tub.  


I'm glad you're here, pull up a chair and sit a spell.
Mountain Belle

Saturday, November 12, 2011

Cabin Bathroom Part II

In my last bathroom post we had emptied the bathroom to the 
framing and had the whitewashed tongue and groove ceiling installed. 

Lots more changes are happening and it's really starting to come together. 

New walls were put up. Hooray for walls! A recessed medicine 
cabinet was installed in the wall. A set of upper cabinets were 
rescued from the kitchen and installed on the wall over the 
new commode. Then it was time to get busy priming.It's so 
much easier to paint if you don't have to worry about the trim work! 

I can't decide what my favorite part of the bathroom will be but I am in love with the new floor! We got 10" wide plank flooring for the bathroom. We stained it before it was put down and we will put floor finish on it when the rest of the work is complete. The floor appears rustic and looks like its always been there;, even without the final finish it is beautiful.

Then the new toilet went in. I'm sure going to miss that old "rock and roll" toilet. Yea, right! The tank is still not on in this picture for ease of painting. We got the primer coats on but the final paint still needed to be completed.
I'm so in love with it already and it's not finished! How about that floor? Isn't she a beauty?

Now it was time to get busy with the final wall paint. At this point we are still managing to stay ahead of the trim work installation. The bathroom will have an old claw foot bathtub and an antique mantle when it's complete. I decided to do a textured wall treatment to keep the vintage them going. This took a bit of extra time but was well worth the effort. I was very pleased with the end result. 

Below is an up close photo of the wall texture. I may also do this same wall treatment in another room of the cabin. Just ignore the shadow, my camera and I weren't agreeing that day but it looks like an old plaster wall.

The wall painting is complete. The cabinet doors were removed
for painting and still need to be finished but the room is now 
ready for the trim to be installed. 


What a difference! There is still more work to come but its made an amazing transformation already.


More updates to come. 


Mountain Belle

Friday, November 11, 2011

Bathroom Update Part I

The cabin bathroom was so ugly and scary when we purchased the cabin that I still shudder when I think about it. It has been a long process but we almost have it completed. The bathroom has involved so much work and has made such drastic changes it will take multiple posts to give all the details.

This is what we started with:
This is the bathroom in its original glory
The shower was so flimsy it was more of a liner then an actual shower. If you slipped in this shower the whole shower would probably come down around you.Sound like fun?


This counter was made from 2x4's and tile. There was a curtain across the lower half but I tossed it before I remembered to take the photo. 

Below is my personal favorite. I call it the "rock and roll" toilet. Seriously, if someone sat down on the toilet it would pitch forward and attempt to throw the unlucky individual onto the floor. It was a rare treat! I'm going to miss that rock and roll toilet. Not!!!

This bathroom needed lots of help. There was nothing we saved
in this bathroom except the studs in the wall.The photo below is
a rug that was on the floor when we bought the cabin. The
cabin had been deserted for so long that the mice took
most of the rug. Yuck! We actually put the rug to the side
and tossed around the idea of framing a piece of it to remind
us how far we had come in the remodeling. About half way
through the bathroom demolition we were so over that idea
that it no longer seemed funny. That the rug was tossed.
Bye bye rug!


I know y'all are all jealous about right now. I couldn't type
that with a straight face! Needless to stay we gutted the
bathroom all the way to the bare studs and started over.

After demolition it was already an improvement to me.
I was actually excited to see nothing but a framed wall
and insulation. While the walls are being torn apart
we opted to put the same white washed tongue and
groove pine on the ceiling that we were using for the
vaulted ceiling in the living area. The ceiling looks
great; my photo does not do it justice. A new overhead
light fixture was installed. I had to allow room for a shower
rod system I had made for the claw foot tub so no chandilier
for this bathroom but it still looks great.   

This room is starting to come together. Next we tackled
the walls and floors. More updates to come!
.
Mountain Belle

Thursday, November 10, 2011

Cabin Windows and Doors


I know I'm behind on the cabin updates and I apologize. We
have been very busy with the cabin. Between our jobs and
working on the cabin whenever we can we have been going
non-stop. When I was home long enough to possibly post I was
behind here or just exhausted.Please accept my apologies. I'll
get you up to date on all our changes. I have lots of posts to write!  

The outside of the cabin has really come along way. The last
exterior photos I posted showed the paint colors we were using
but since then we have made even more changes.
Cabin after exterior color and before new windows 
The new windows and patio doors have been delivered and
installation is complete. It is really making a big difference have
the old windows replaced. Of course nothing is ever just a simple
job. We made some changes in the existing window and door
configuration so openings had to be resized.  The front of the
cabin had 2 patio doors. We decided to replace with 1 patio
door and 2 side accent windows. The double window on the
front was shortened to be above kitchen counter height inside.
The kitchen sink in the new kitchen will go under that set of windows.                                                                                                                                             


After the openings were resized they needed to be primed and
painted multiple times. The Husband got busy with his paint brush.


We also had several new window openings added. We had two
awning style windows added to the back of the house on our
bedroom wall.
awning windows added to bedroom    
We also added 2 awning windows in each gable end of the
cabin. These windows will be a great air flow benefit as they
can remain open during rain and the extra light they allow has
made a big difference.

We are having a flood light added above the awning window
which is what those wires are for. The acreen door is new but
the main door and the trim around it are still waiting to be replaced.
I'm still holding out for the right door; giving the old one a paint
job till then. I'll find it .... soon I hope!

From this:
To this:

Yes, that is snow you see!

More updates coming. We have been really busy!

I'm glad you're here, pull up a chair and sit a spell.
Mountain Belle